Let’s make a 3D impression using Da Vinci Pro 1.0 by XYZ Printing
Process
Using the XYZmaker software or other CAD program of your choice, begin the process to design each of the parts of your molecules. It may help your students to first sketch out the shape and size of their design on paper before trying to design it in the CAD program.
3D Printing Process
Once your designs are complete, you can start to process the files using the included XYZware slicer software.
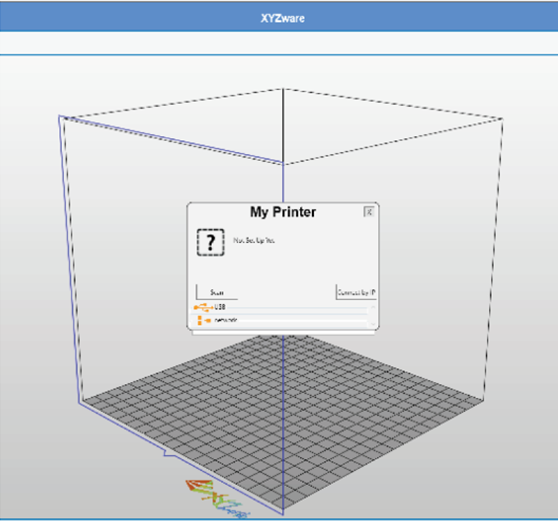
Step 1. Launch the XYZware software. Ensure that your 3D Printer is setup and connected to your computer. If it is not connected, you will see the following message:
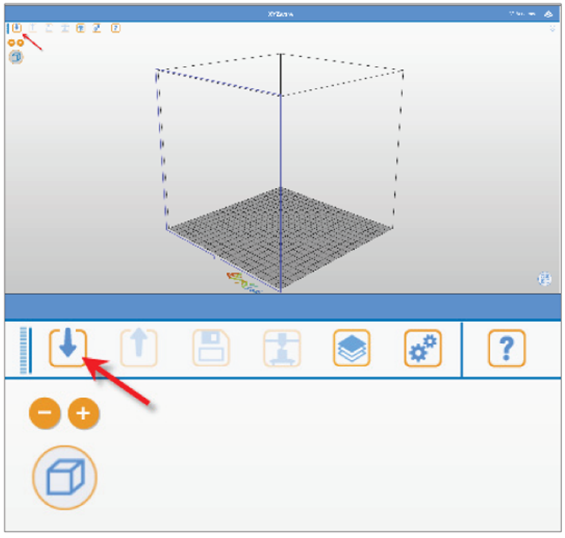
Step 2. Import your design file(s) that you want to print. The following formats can be imported:
– .3w
– .stl
– .nkg
– .3mf
Import in the sample files for this project: 30-01.stl, 30-02.stl
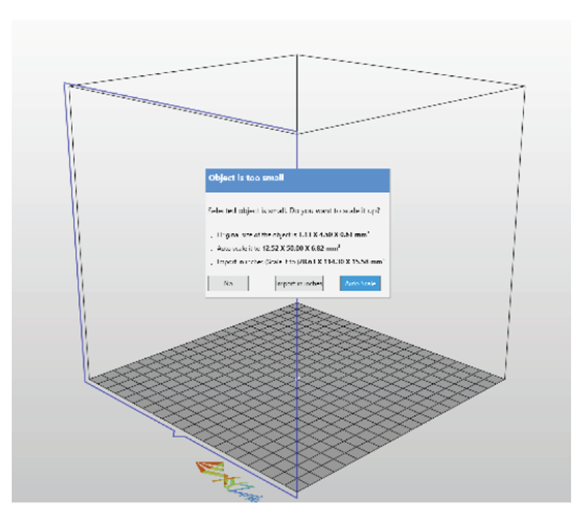
Step 3. Select the scale of your 3D model. After selecting your option, the model will be auto placed on the center of your build platform. If importing in more than one part, each part can be moved along the X and Y axis to allow for multiple parts to be built at the same time.
Step 4. Once you have your settings configured, you can either save the configuration or print the file.
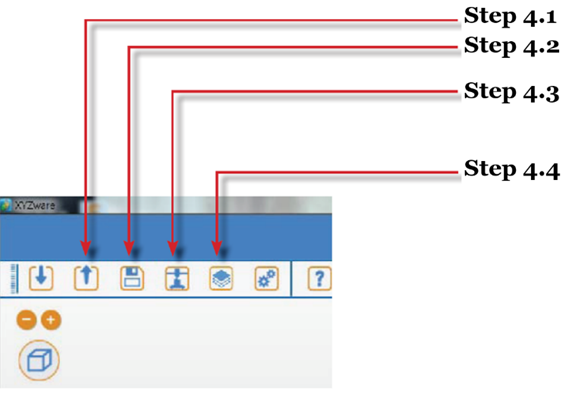
Step 4.1. Export your settings to other XYZprinting brand 3D Printers.
Step 4.2. Save the file
Step 4.3. Start your print. This option will send the information to your 3D Printer. Make sure that you have the 3D Printer connected to your computer that is running the XYZware software.
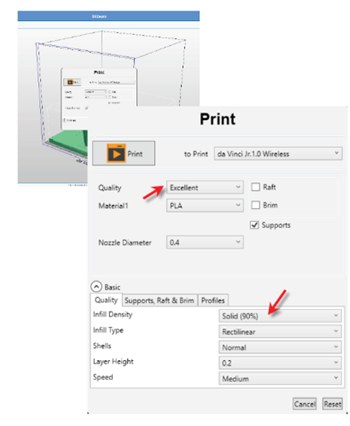
For best print results, change the Quality to the Excellent setting. If you are having adhesion problems, select the Raft and Brim options. If parts are adhering to the print bed without any problems, uncheck the Raft and Brim options and only select Supports.
Select the Advanced option to change the infill settings. Click on the Infill Density option. To ensure the part has a solid core, change the infill settings to 90% and the Quality to Excellent. Changing the infill setting to a more solid infill will produce a stronger part and allow for more torque to be applied to the part.
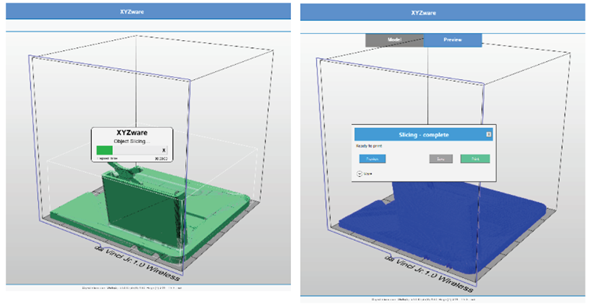
After selecting all of your options, click on the Print button to start printing. Before the part can be printed, the 3D model needs to be sliced into layers. The XYZware program will slice your object and notify you when the slicing is completed.
Once the slicing is completed, click on the Print button to send the job to the printer.
Did you like the content? Did you take any doubts? Take advantage and check all the content and products available on the Datasonic website, a pioneer in cutting-edge technological equipment that stands out for its diversity of brands, models and especially prices is at your disposal, so you can take all your doubts, compare prices and finally, choose the best product for you. On the website it is possible to find numerous models of 3D printers with the most diverse resources, configurations and related equipment. The Datasonic website has a wide portfolio and a range of varied products, all at your disposal.
The Datasonic website is available to you 24 hours a day, 7 days a week. Just waiting for you to come and check out all the technology in equipment we provide for you and your company. What are you waiting for? Visit us right now.

Access: https://datasonic.com.br